I'm thinking about making a tiny keyboard based off the work of di0ib/40% club and I thought I should post my planning here to make it easier for others to build something similar as di0ib/40% club isn't too detailed in his methodology. If you know nothing about Mechanical Keyboards, it's best to read this primer by Overclock.net, which is a little outdated, but quite comprehensive, and look up youtube tutorials by TaeKeyboards (who also has a really useful equipment guide for Australians.).
Also, join a forum like TypeHype to participate in group buys or ask for advice.
The dream:
A tiny keyboard for typing + multiple other tiny keyboards for macros and added functionality. A main keyboard plus macropad for shortcuts in different programs because each keyboard is only a percentage of a full keyboard. Ideally it would look like this...
but might end up making a GNAP! 40% keyboard (~47 keys) instead. (Layout Comparison)
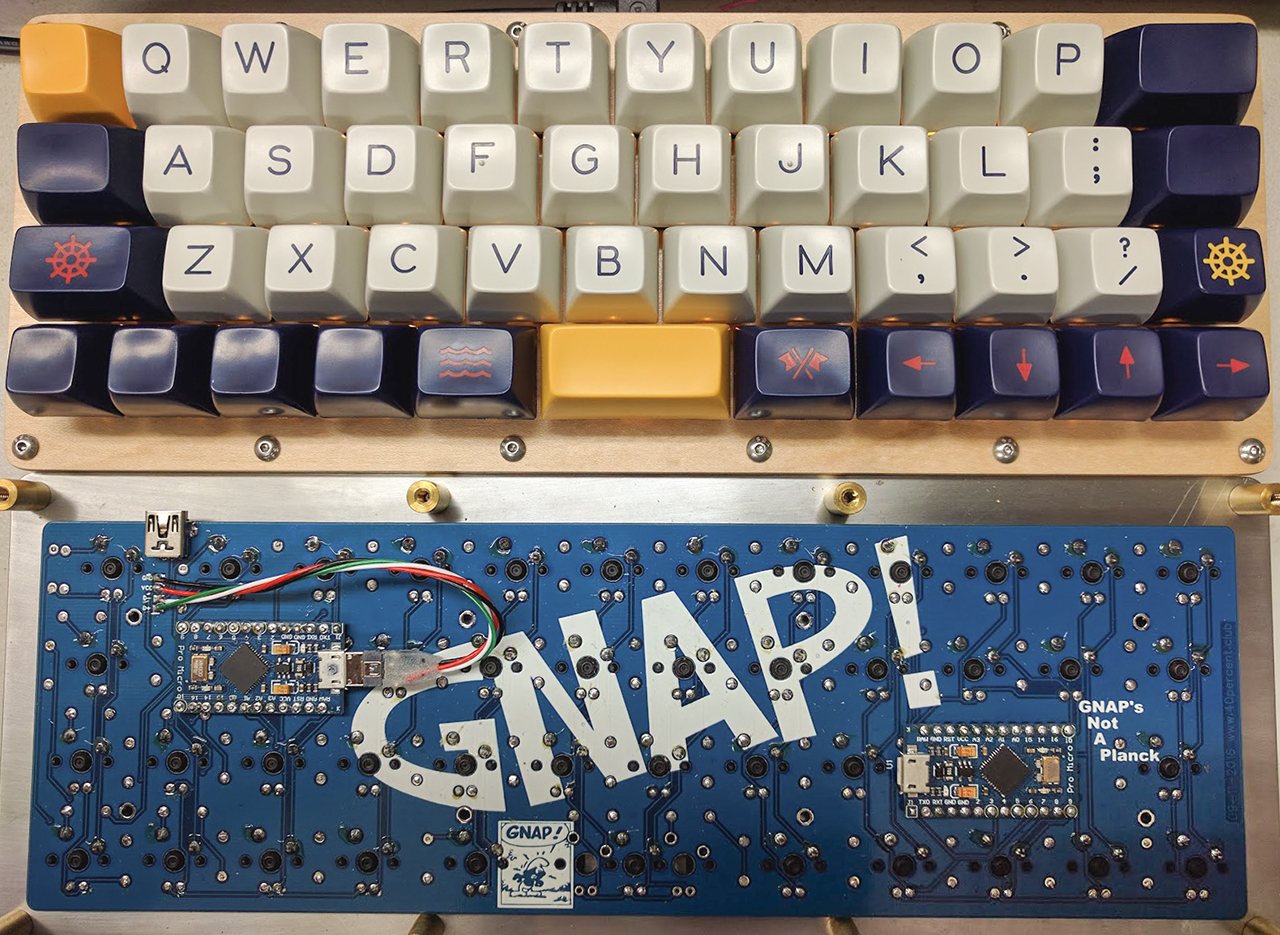
The main advantage of making the smaller keyboard is that parts are cheaper and the project is smaller overall. The GNAP! PCB (printed circuit board) design is creative commons, meaning anyone can have it printed and shipped to them using a manufacturer like JLCPCB.
Progress update:
-All gear has arrived, but I haven't yet acquired a soldering iron.
-I realised that I don't actually need the MOSFETS. Those were for other keyboards.
-Sold kits of bits to some friends from the local MechKB community, and have seen a successful build from my friend Jeremy.
-PCB plate is worth getting double-sided, as otherwise the ugly side of the PCB is facing up.
GNAP!
Guides & Reference Links
PCB reference on Github
Pics of board and assembly - read older posts first.
Build Log by Keyhive / u/Network_Operations
Software:
Software - TMK build by di0ib
Flashing TMK/QMK via a virtual machine
Flashing Firmware | Flashing Firmware [reddit]
Custom QMK firmware Builder | Custom TMK firmware builder | Paste Keyboard Layout Editor Raw Data: Here's a basic Layout...
On Windows 10 you need:
QMK toolbox
MSYS2
Software for getting LEDs going: Arduino IDE, sketch on di0ib's Github as above
Apparently, once firmware is compiled, all you need to type is make. LED sketch is are currently proving harder.
Hardware:
I'm buying parts for five of the same keyboard at once. I'll probably end up with spares, particularly of PCBs, but might give some away as presents/trades/send one on as a project.
- PCB: Printed at JLCPCB from Gerbers provided by di0ib on Github
- Plate: See PCB.
- Bottom/case: See PCB.
- 47 x Switches: This is one of the most flexible components in the build. I like the look and feel of Zealio Switches, but they're just too expensive ($180 AUD for 200 switches. At the time of writing, Zealios are at the group buy stage ahead of their R9 revision, and are cheaper than they would be later on).
Better options are:- set of 200 from the KBDFans AliExpress store for $67AUD with free shipping.
- 120 Gateron browns for about $55 AUD from local stores
- Kailh BOX switches (but they don't support through-hole LEDs, so not for this build).
- Stabiliser: Cherry MX/GMK/Costar 2U stabs.
- 47 x Keycaps: I'm going with DSA keycaps because it means I can use different width caps from any row on a different layout and repurpose them to fit with the GNAP! layout, which uses lots of 1.5U keys. If I wasn't going with DSA, I'd probably buy a bunch of blank 60%/ergodox modifier keys from PimpMyKeyboard, or it's not too hard to find blank caps in different widths on AliExpress.
As I'm making a few of these keyboards for presents, trades, etc. I'm getting a few different keycap sets and combining them. Blue/Yellow to match my case, Orange [edit: when they arrived, they were closer to yellow], White. - 12 x Standoffs: 12mm M2 spacers (from AliExpress) between plate and bottom recommended to allow enough space between bottom/pcb/plate with pro micros and switches sandwiched in between. I'm doing at least one with a wooden base and will use 3mm or 4mm standoffs for those.
- 40 x Screws: I'm using panhead3mm M2 screws from RS Online because they'll work with the small 4mm standoffs.
- 47 x Diodes:1N4148 Tube LCSC P/N:C85057 Manufacturer P/N:1N4148 Manufacturer: STARSEA
- Resistors: Needed for LEDs. Can't remember how I chose these resistors? Maybe from this post? Pic of placement here. 470Ω(4700) ±1% LCSC P/N:C119577 MFR P/N:MF2WS-470Ω±1% T MFR:CCOP/N C119577 [edit: Resistors are too big and therefore need to be soldered underneath to avoid impeding switches].
MOSFET: AO4406AL LCSC P/N:C35349 MFR P/N:AO4406AL MFR:AOS[edit: not needed].- Mini-USB Connector: I'm getting my connector from RS Online, which is great if you live in Australia or other places outside the US. Di0ib reccomends Digikey in the US. Just search for part number 54819-0519 on their store.
- 2 x Pro-micro: One for LEDs, one for switches. I'm getting mine from AliExpress because the authentic Arduinos in Australia sell for about $55 AUD each.
- 47 x LEDs: Recommended LEDs are 2x3x4mm or 1.8mm LEDs at the brightest output available. I'm getting these 2x3x4mm LEDs from AliExpress for $22AUD.
Note that this PCB does not support RGB LEDs as they require an extra pin, and the board is set up for through-hole two-pin LEDs. SMD-LEDs are used on other boards like the Tomato or Zeal60 to achieve per-key RGB lighting. I may have a go at creating an alternate version of the PCB if this batch goes well as it's licensed under CC-BY NC SA 4.0, and the switches I'm using are all SMD compatible.
Cost:
Haven't added it all up yet...
Build Log:
I need to acquire a soldering iron first... check out the build log from Network_Operations instead.